
CustomMyGrillz · DIY Mold Kit
Complete Dental Impression Making Guide
Follow these steps carefully to create clear upper and lower dental impressions for your custom grillz.
Prepare the kit
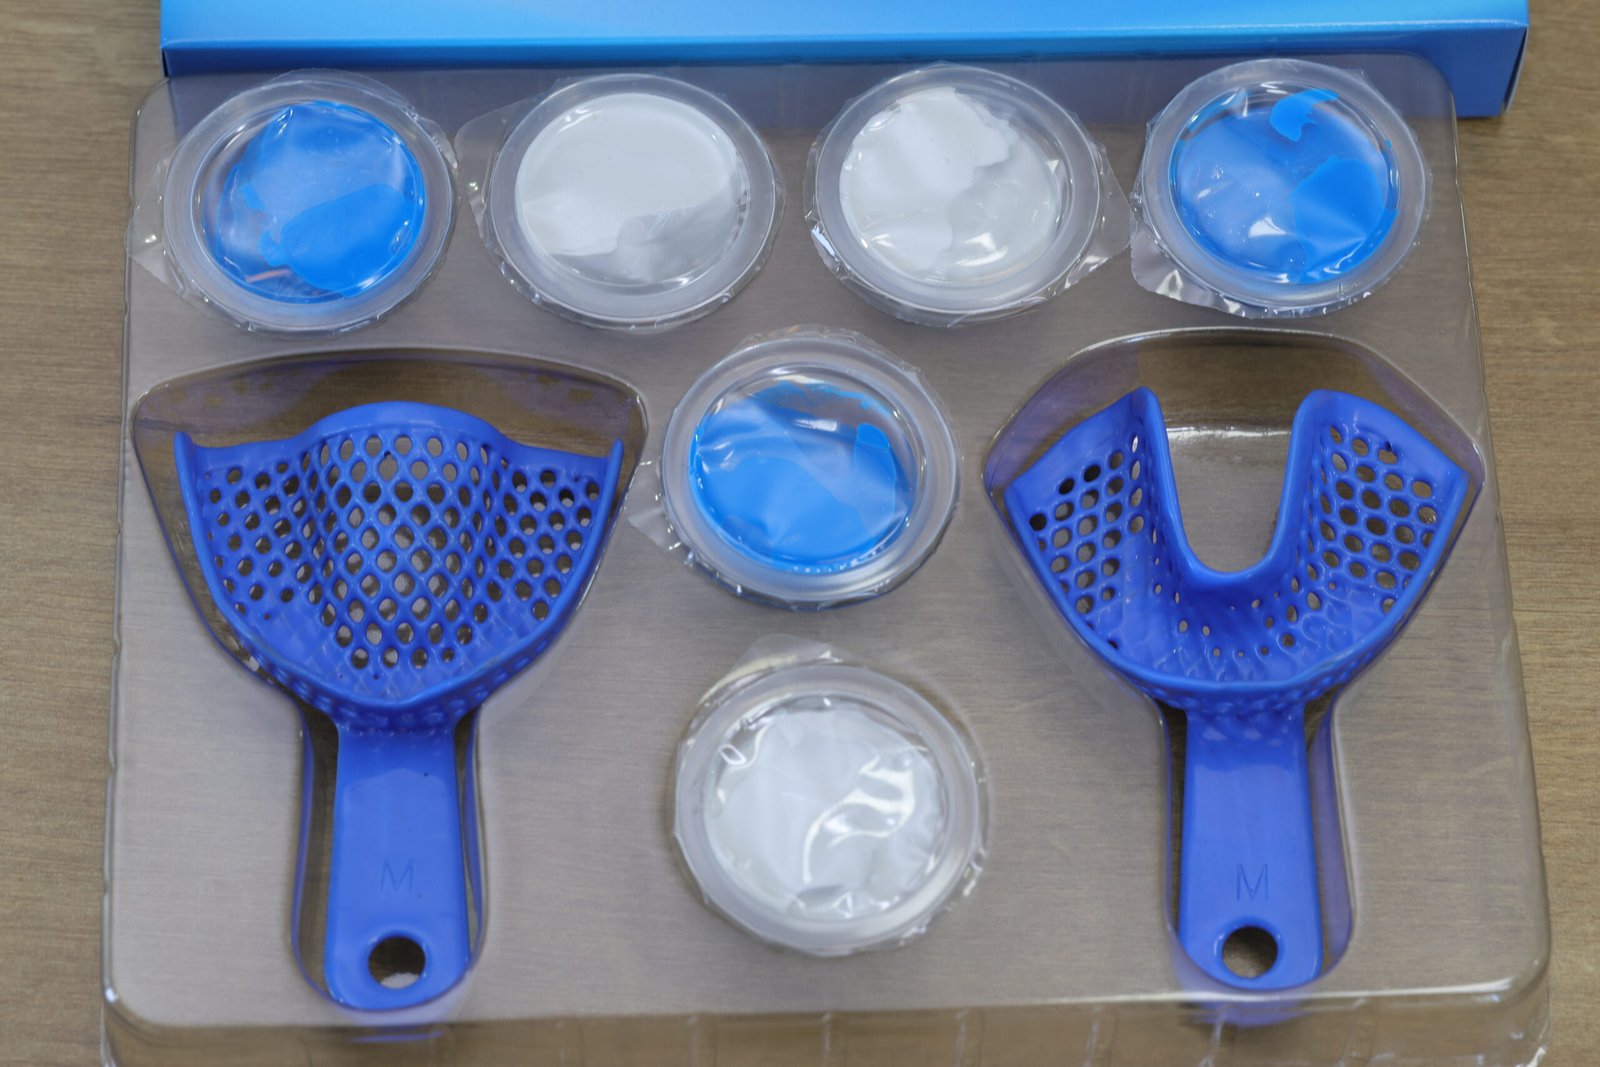
Your kit contains three packs of blue putty, three packs of white putty, and upper and lower impression trays. Take one blue pack and one white pack for the first impression.
Mix and load the putty
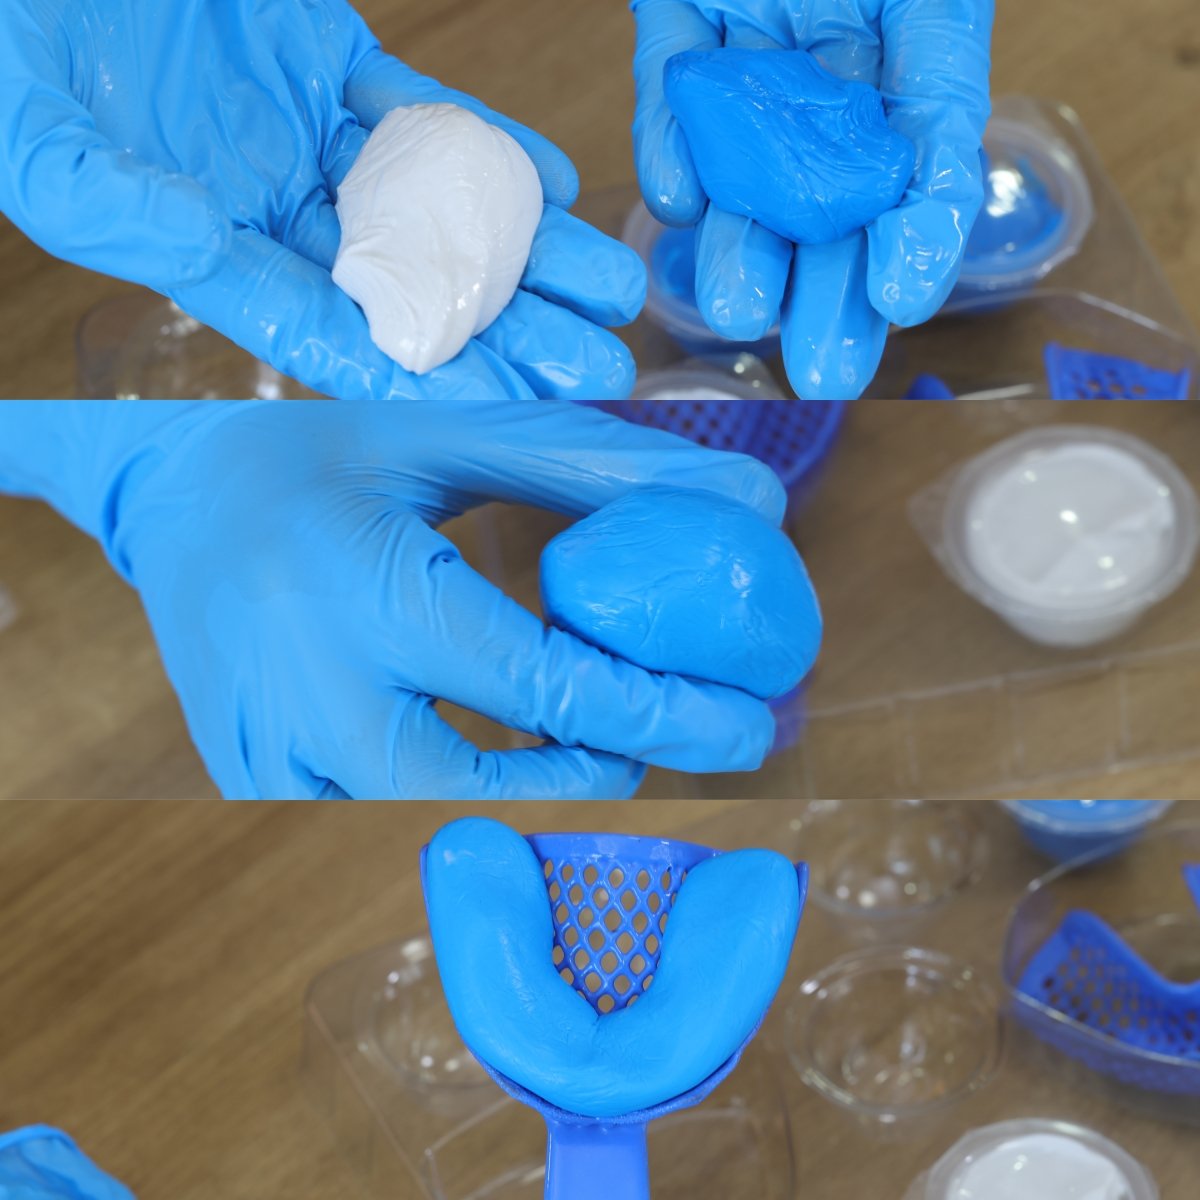
Knead the blue and white putty thoroughly until the two colors form one uniform shade. Immediately spread the mixture evenly into the matching impression tray.
Take the first impression
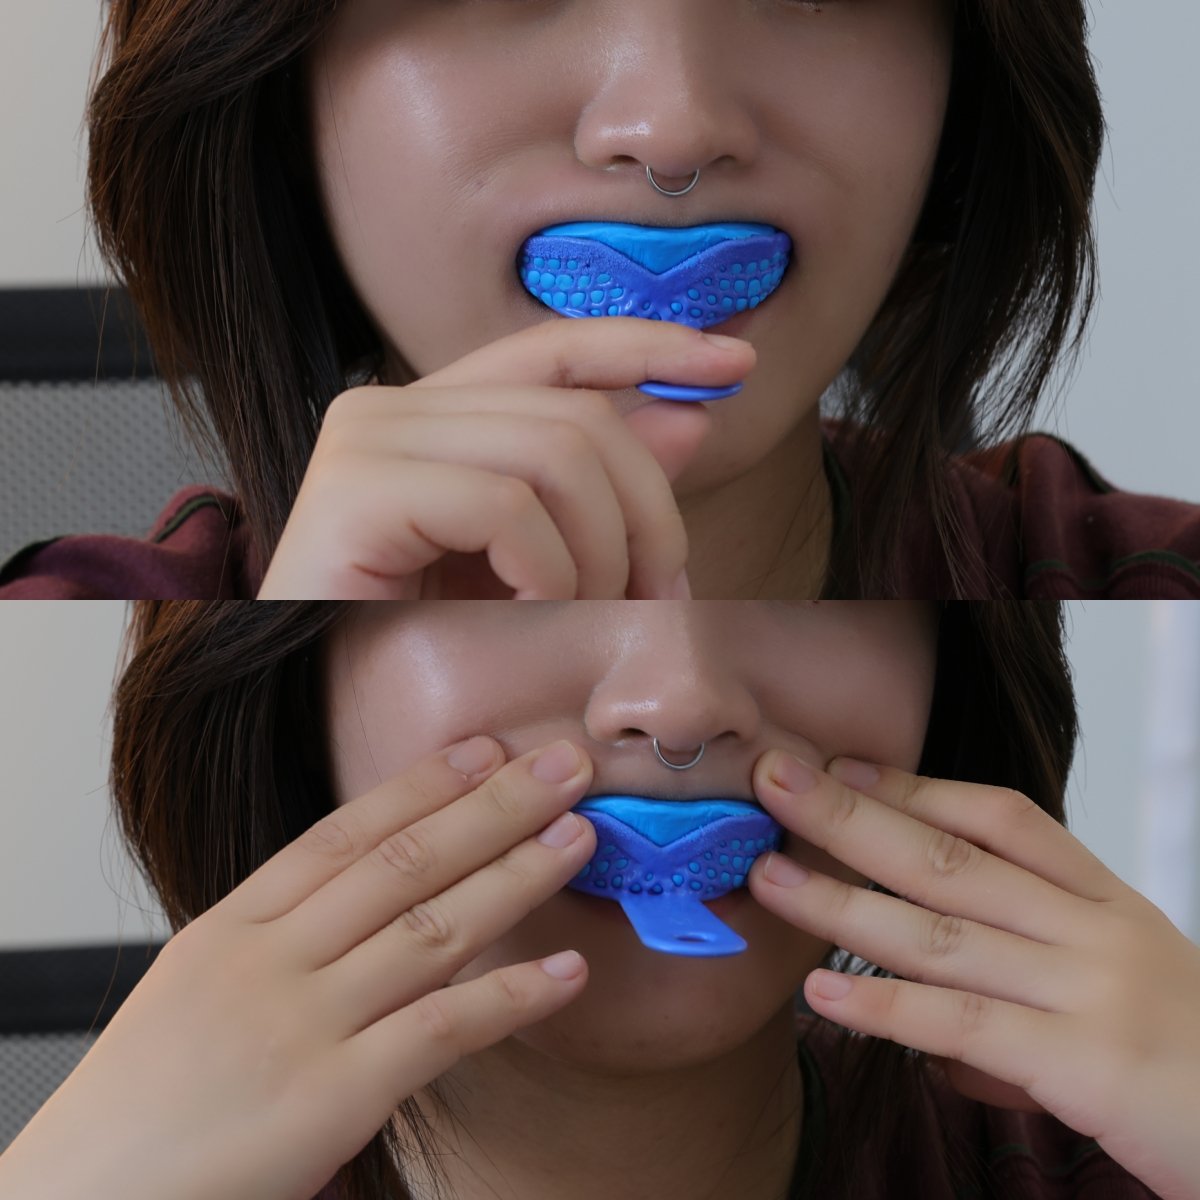
Insert the tray into your mouth. For the upper teeth, lift it slightly upward, then gently press around your lips so the material captures the full contours of your teeth. Keep your head and mouth completely still for 3 minutes.
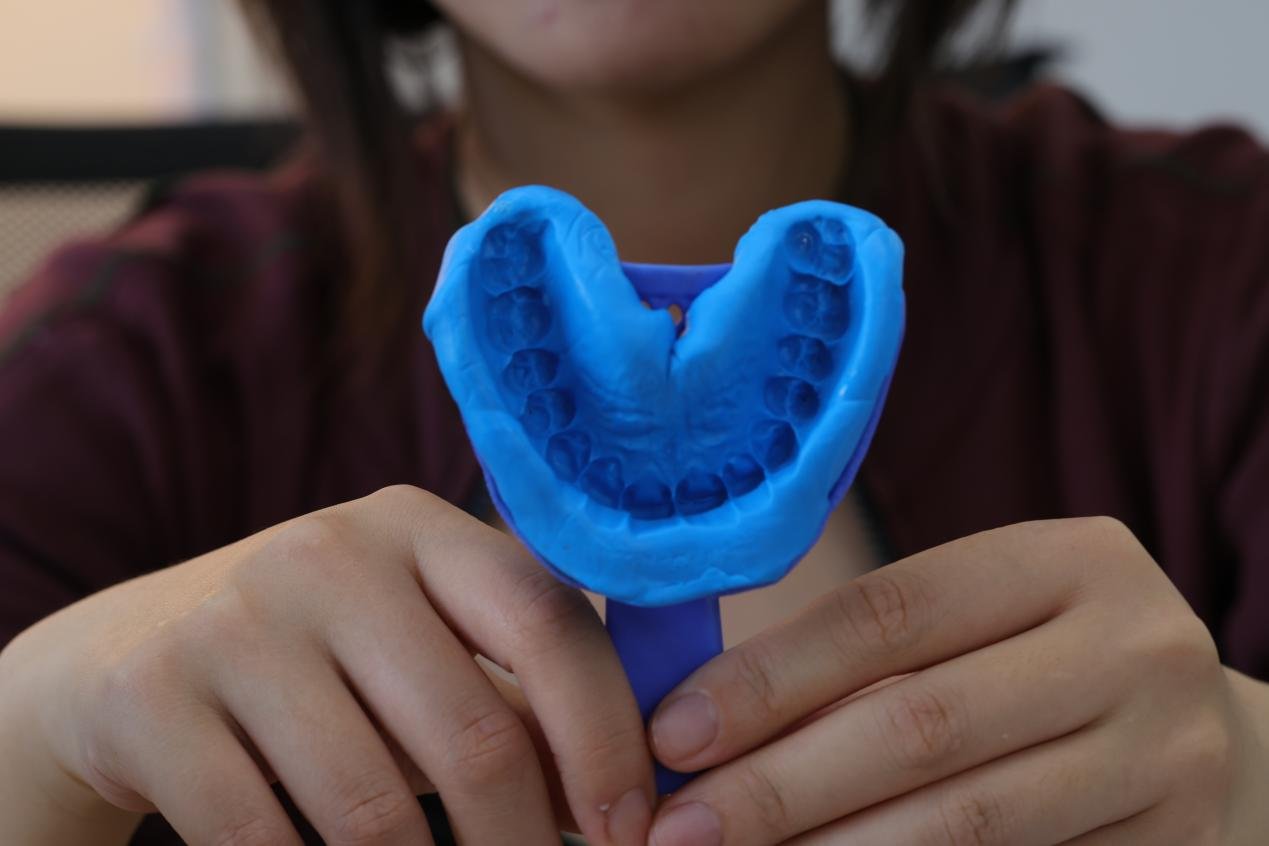
Remove and inspect
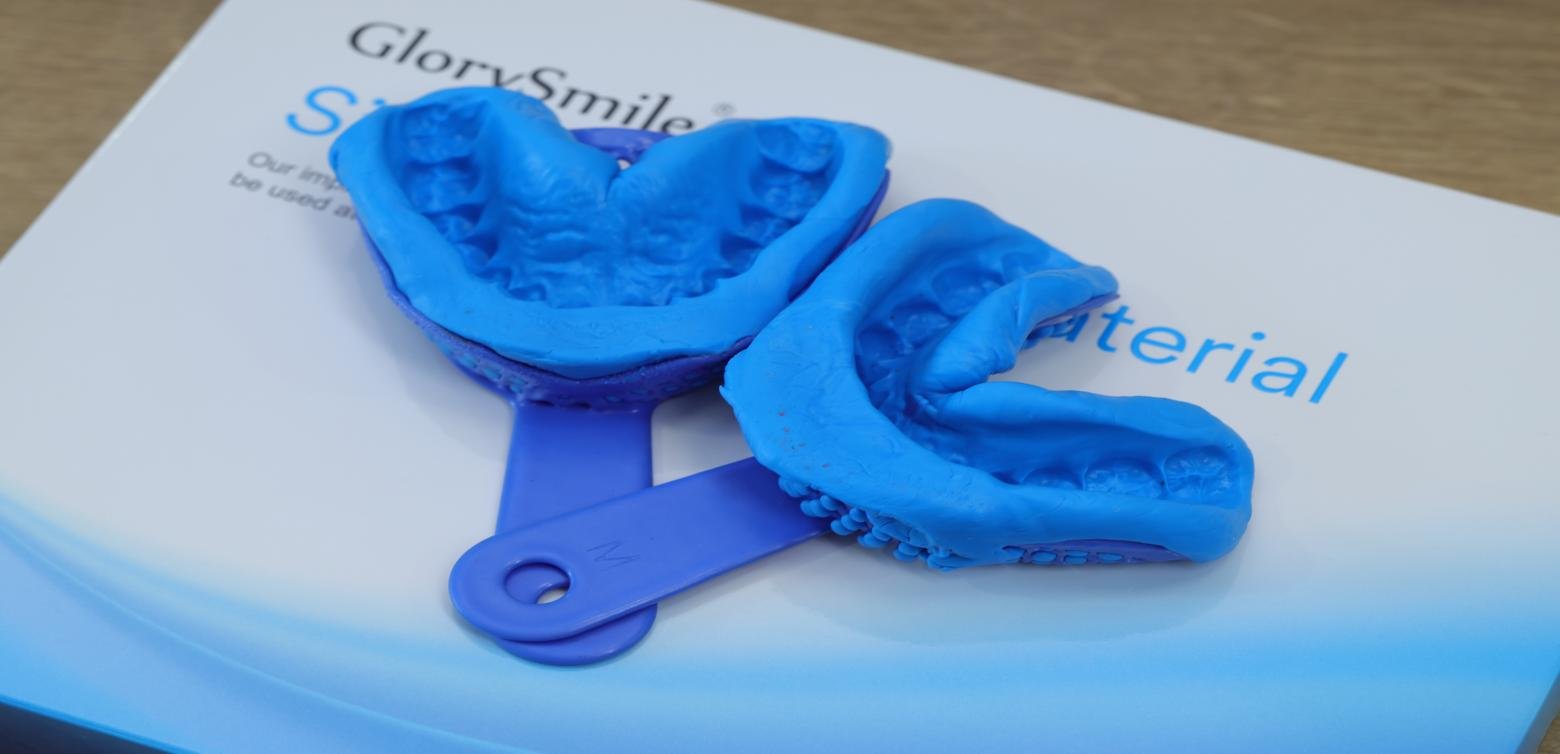
After 3 minutes, carefully remove the tray. A usable impression should show sharp tooth shapes, clear gum lines, and intact fine details without dragging or missing areas.
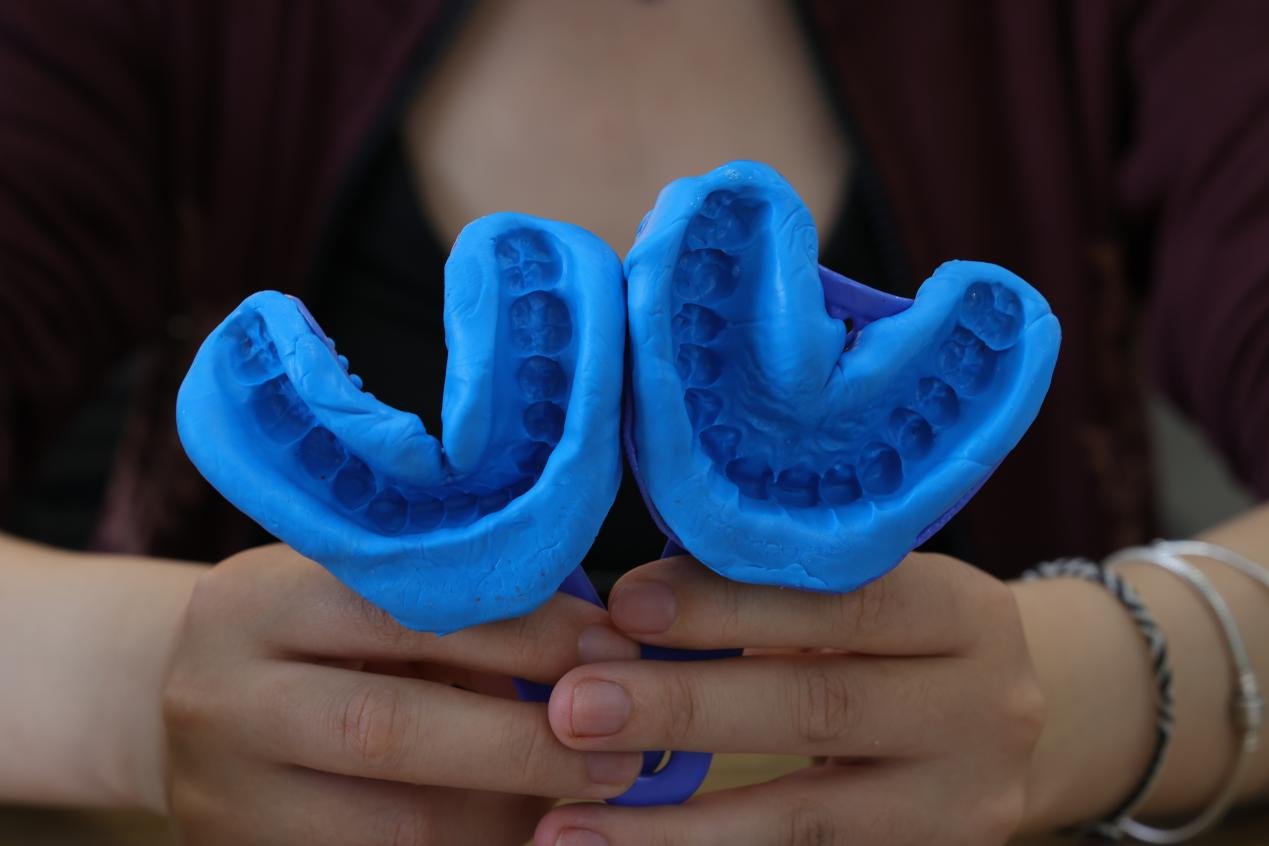
Repeat for the lower teeth
Use another blue pack and white pack and follow the same mixing, loading, fitting, and 3-minute setting process to create the lower impression.
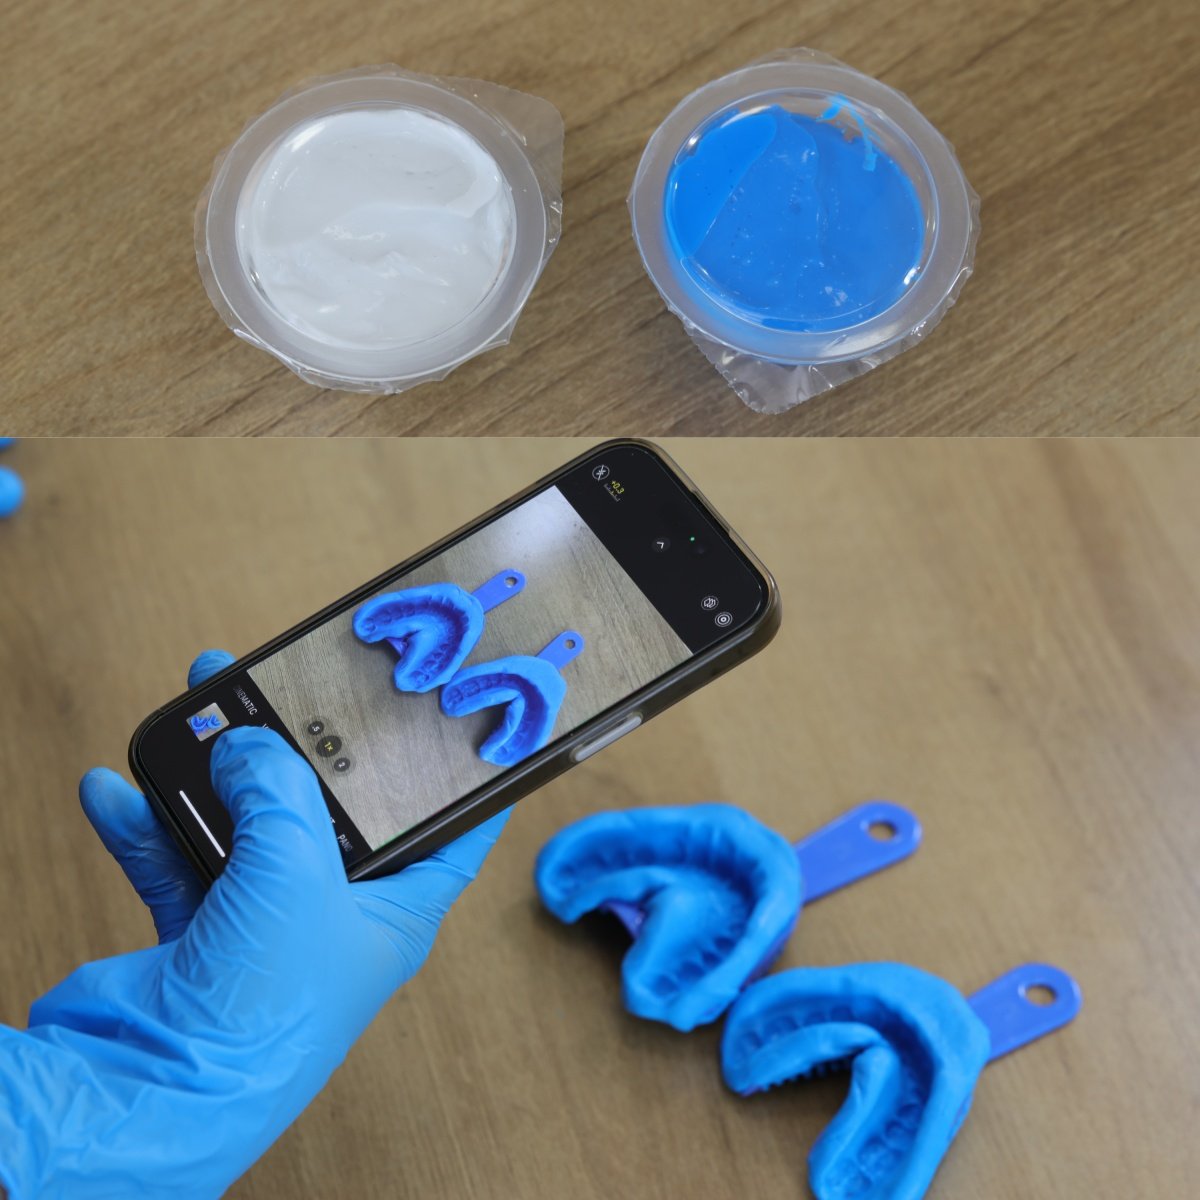
Send photos for quality inspection
Photograph both impressions clearly and send the photos to our QC team. Keep the remaining blue and white putty as spare material in case either impression needs to be remade.
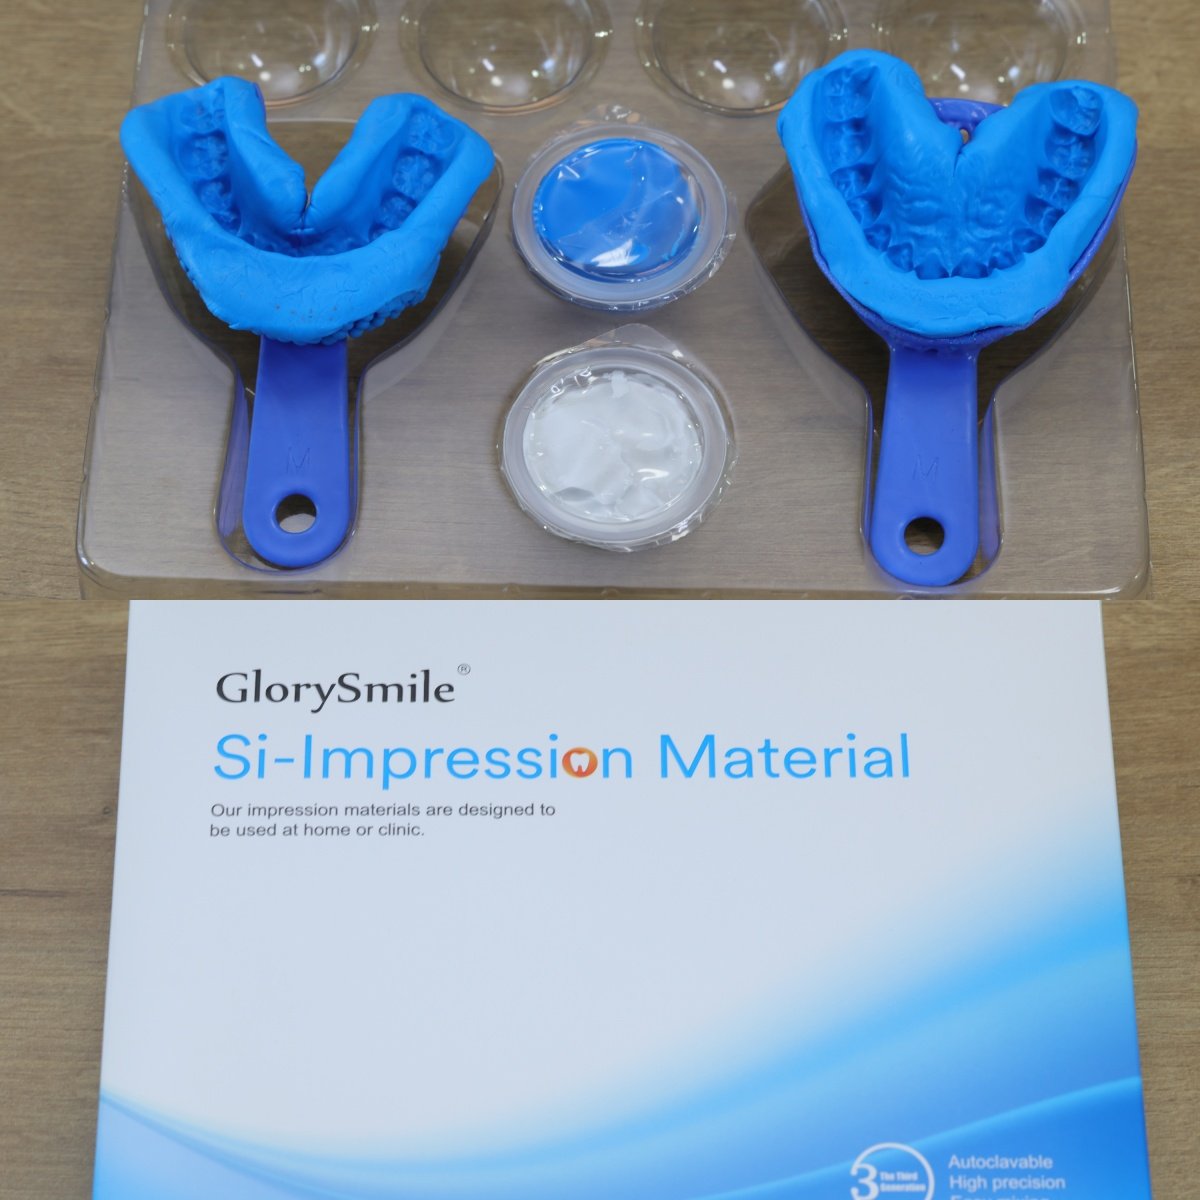
Pack the approved impressions
Once both impressions pass inspection, place them in the matching storage case and let us know. Our team will arrange pickup and begin your custom grillz production after the molds arrive.
Need help?
Contact our support team before remaking or shipping your impressions. Clear photos help us confirm that your molds are ready.